Find What Fits Your Toyota


ICS Fab Toyota Sequoia Dash Mount | '08 - '17 Sequoia
ICS Fab Toyota Sequoia Dash Mount | '08 - '17 Sequoia

In stock
Fulfilled by ICS FAB
Dash mount for 2008–2017 Toyota Sequoia. AMPS-compatible, no drilling required. Securely mounts phones, tablets, radios & more. Includes all hardware.
Couldn't load pickup availability


Fast US Standard Shipping &
Easy International Shipping
30-Day Returns
TG Pro
Satisfaction Promise
Trail Grid Pro Tested
- Details
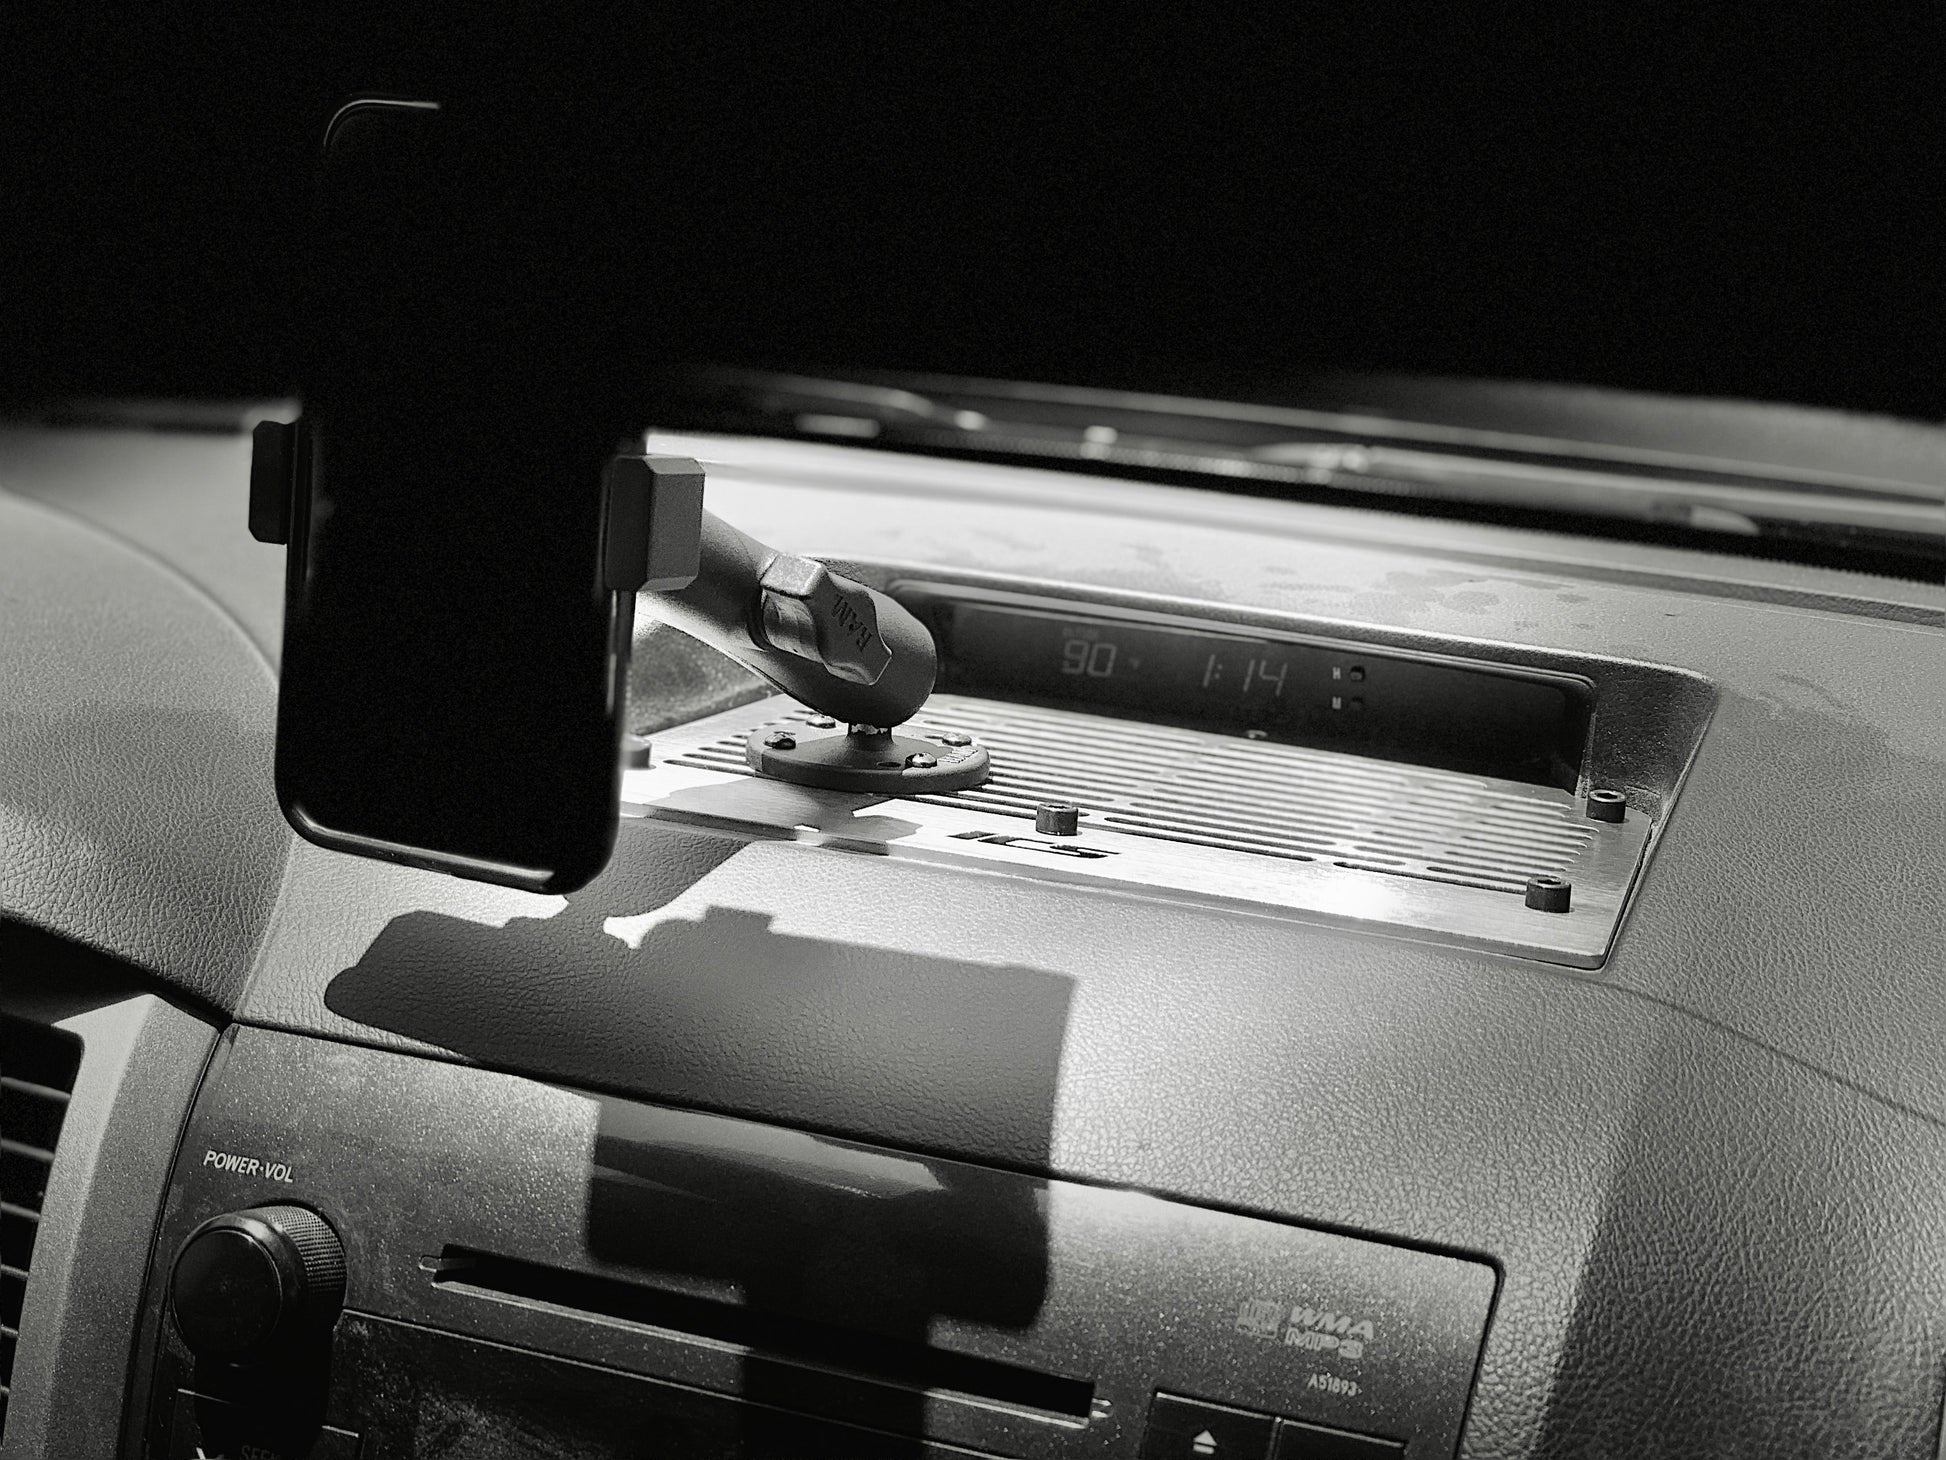
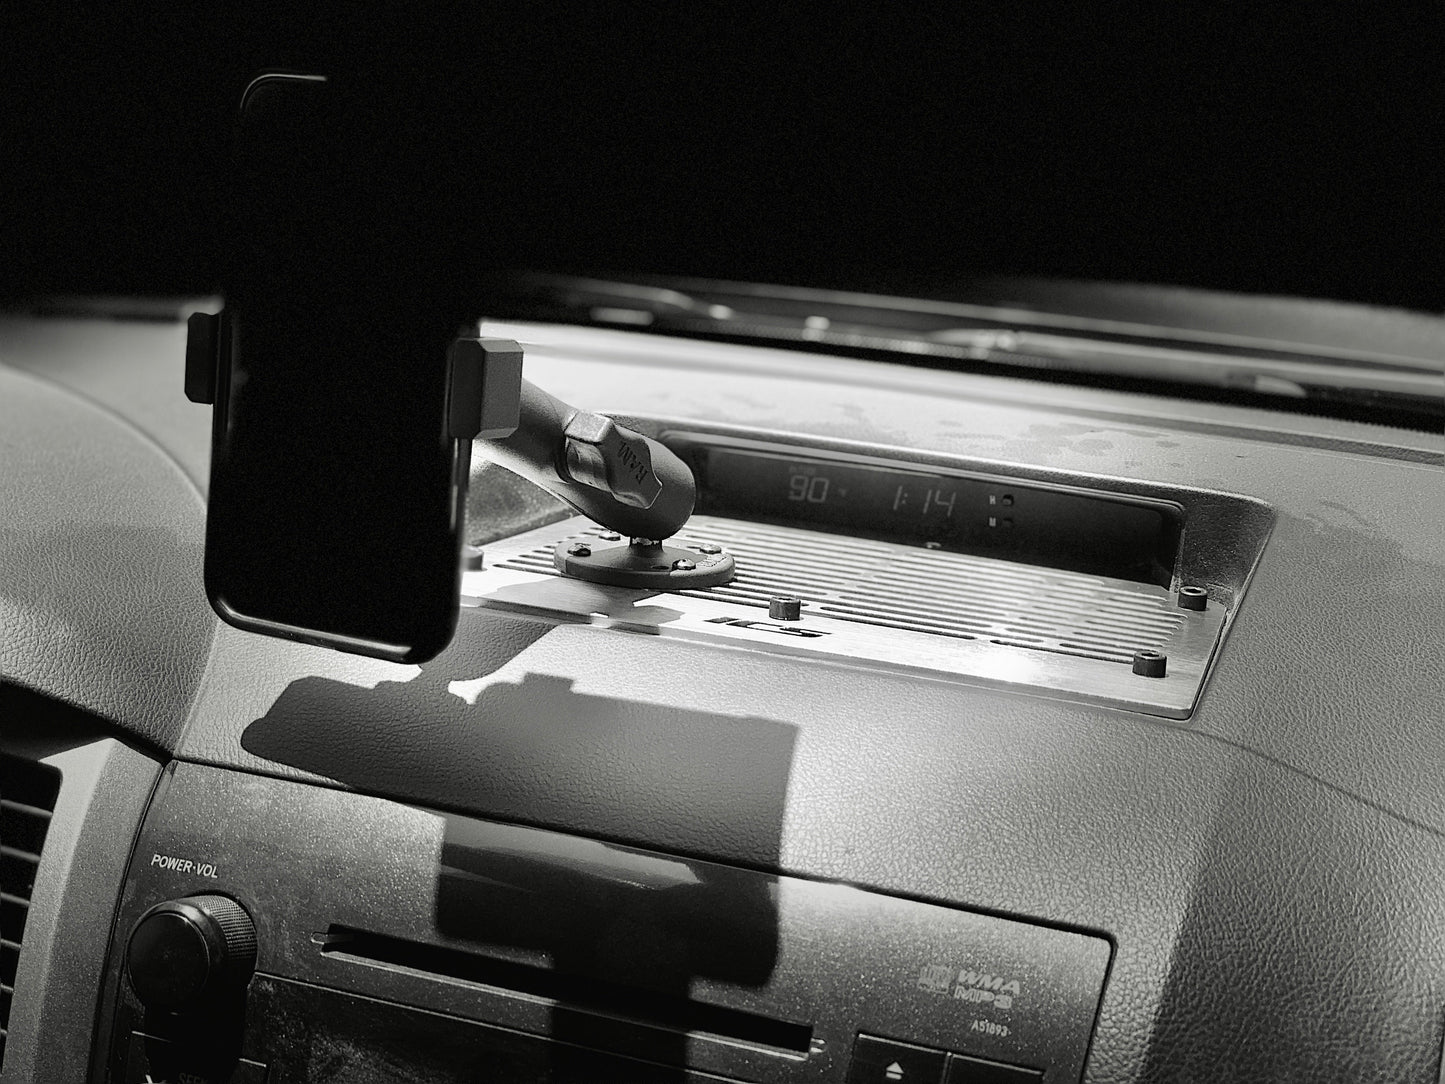
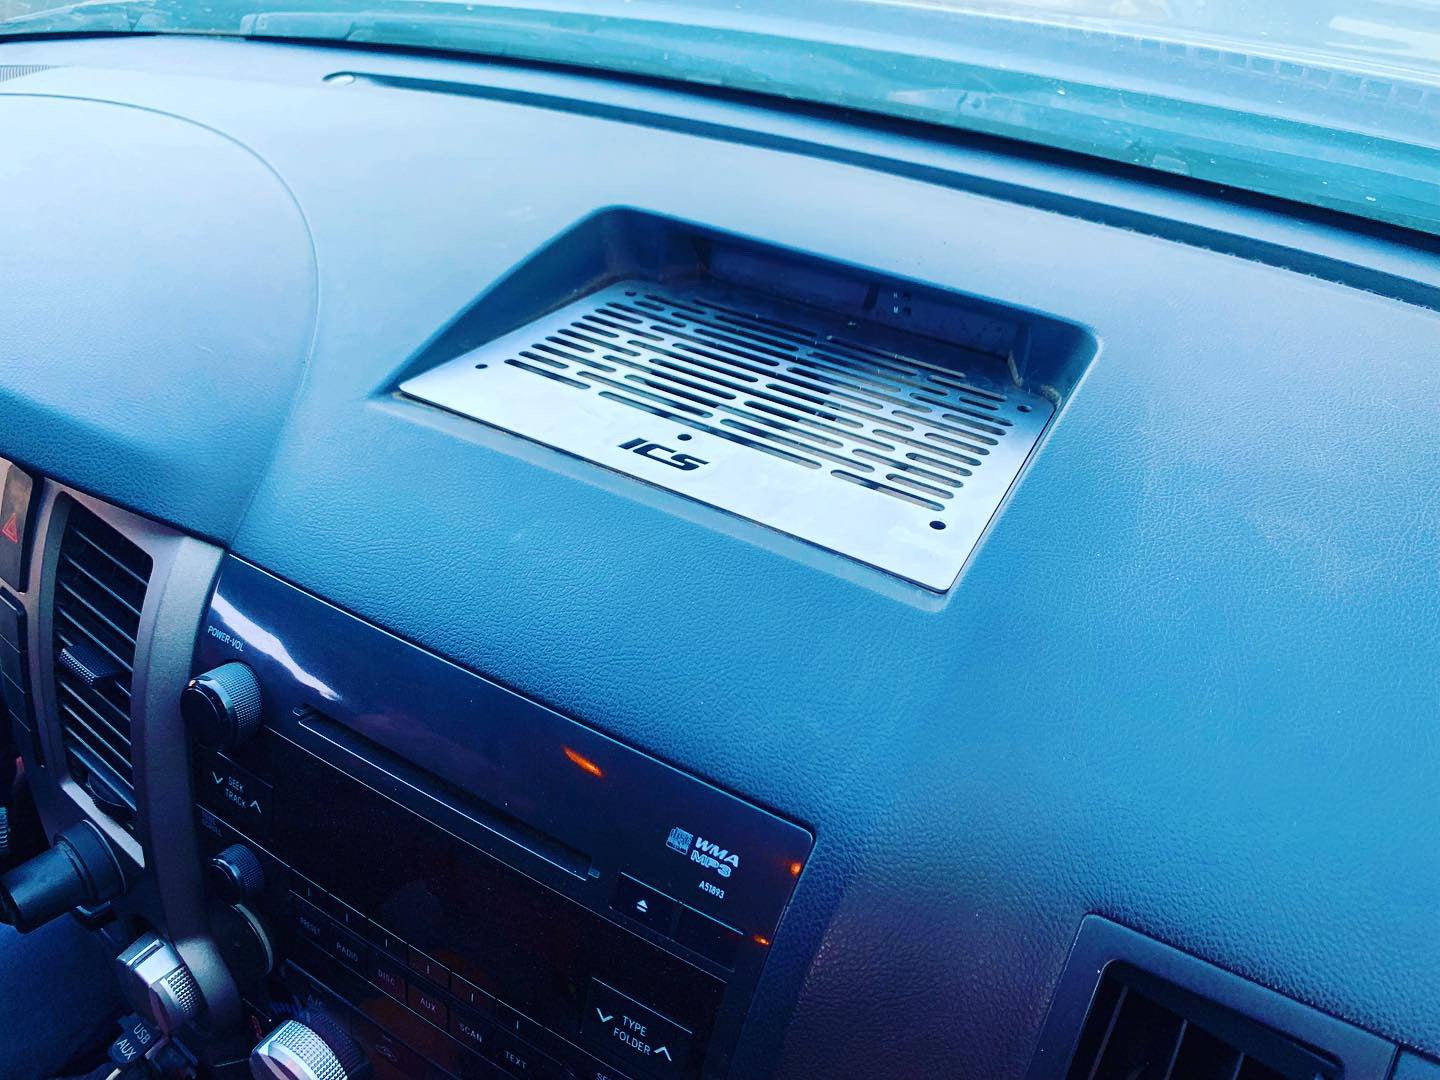
AMPS-Compatible Dash Mount – 2008–2017 Toyota Sequoia
This dash mount is engineered to fit the 2008–2017 Toyota Sequoia and is compatible with AMPS standard attachments. It’s the perfect solution for securely mounting phones, tablets, dash cams, CBs, radios, and more—giving you a clean, factory-style setup with no drilling required.
Kit Includes:
- CNC laser-cut dash mount with fine black textured powder coat finish
- (5) M6 stainless steel hex socket cap screws
- (3) Stainless steel fender washers
- (2) Steel rectangular washers
- (5) M6 stainless steel nylon lock nuts
- Lifetime warranty against manufacturing defects and workmanship
⚠️ California Residents: WARNING – Cancer and Reproductive Harm
Optional: Dual QC 3.0 USB charger available
Before You Buy:
- Installation requires removal of the 12V socket trim, A/C controls, and radio
- No drilling required
- If your Sequoia has a center dash speaker, it must be removed or relocated under the dash if your mounts (e.g., RAM) make contact
- Factory speakers are bolted from the top—we recommend using 1/2” screws for any reinstallation
- Buyer assumes all risk of modification. ICS Fab is not responsible for injury or property damage from incorrect installation
Installation video coming soon.
Tip: Pre-install your mounts (RAM, etc.) on the dash plate before starting installation.
Tools Required:
- 5mm Allen wrench
- 10mm socket
- Long extension
- Ratchet
- Trim removal tools
Installation Steps:
- Use trim tools to remove the center dashboard speaker cover.
- Install your preferred mounts (e.g., RAM) on the dash mount in your desired layout.
- Insert the five provided screws through the dash mount and test-fit it on the dash. Ensure no mount hardware interferes with the dashboard.
- Pull out the lower 12V socket tray—no need to unplug, just lay it aside.
- Remove trim around the A/C fan speed knob and pull out the A/C control panel. Set it aside.
- Remove the four 10mm bolts securing the radio. Disconnect the antenna cable and lay the radio aside.
- Install the dash mount using the provided screws.
- Attach the fender washers and lock nuts to the three front screws.
- Attach the rectangular washers and lock nuts to the two rear screws.
- Tighten all screws hand-tight, then a 1/4 turn more. Do not overtighten.
- Reassemble the radio and trim components.