
Install Your Voxx Power Systems Battery Backup
Here is a simple and easy breakdown of how to install you new Voxx Power Systems Battery Backup.
Step 1
Check the packaging and make sure it hasn't been damaged during shipping; then check to make sure that you received all the parts yo will need for your install:
- (1) Voxx Power Systems POWV3.5 Battery
- (1) 200 Amp fuse block
- (1) 10mm bolt
- (6) Pieces of velcro
- (4) Zip ties
- (1 Foot) Ground wire attached to unit
- (9 Feet) Power wire attached to unit
- (1) 6 inch power wire
Tools Needed:
- 10mm wrench or socket (Secure included grounding bolt)
- 12mm wrench of socket (Secure power wire to positive (+) battery terminal)
- 14mm wrench or socket (Remove driver seat bolts)
- 5mm Allen wrench (Securing screws on fuse block)
- Utility knife
- Wire fish or coat hanger
- Electrical tape
- Side cutter
Step 2
Read all the Voxx Power Systems installation directions and read any important message from the manufacturer.
Step 3
Remove the front and rear seat bolt covers and use 14mm socket to remove the 4 bolts securing the drivers seat. You do not have to fully remove the seat to perform this installation, simply lean the drivers seat back into the back seat for better access.


Step 4
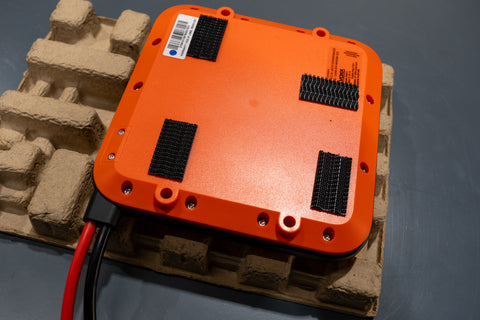
Secure the supplied velco to the bottom of the unit as shown below. Ensure that the hook and loop portion is facing away from the unit. This is what will secure the unit to the vehicles carpet.
Step 5
Pick desired location for the Voxx Power Systems Backup Battery.
Pro Tip: Decide wether you would like the Go/Status button facing the front or back of the seat. Position the unit in such a way that the button is easily reached when you are unable to move the powered seats.

Step 6
Remove the door sill by pulling up on the panel. Ensure that all of the retaining clips are still in the door sill panel. If not use a panel removal tool or screwdriver to remove the clips and place them back in the door sill panel.

Step 7
Remove the kick panel near the dummy pedal by removing the button retainer and pulling the panel towards the brake pedal.

Step 8
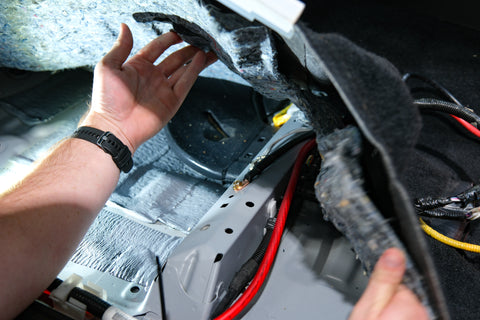
Route the black ground wire through the opening in the carpet. Below the carper is a pre-threaded hole in the floor pan. Use the supplied 10 mm bolt to secure the ground cable to the pre-threaded hole shown below.
4Runner
Tacoma
Tundra
Step 9
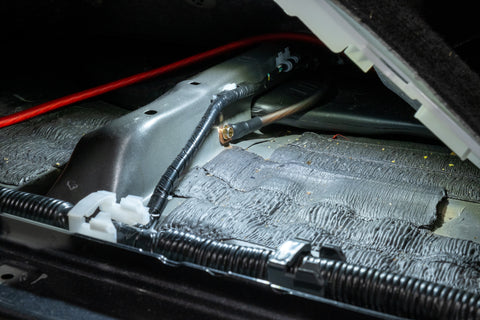
Route the power wire through the same opening in the carpet and towards the factory wiring channel under the door sill. Route the wire towards the firewall towards the main firewall grommet.

Step 10
Use utility knife to cut an "X" in the firewall grommet so that the power wire may be passed through into the engine compartment.
Step 11
Use a wire fish or coat hanger to pull the ground wire through the firewall grommet. We recommend passing the wire fish from the engine compartment into the drivers footwell, use electrical tape to secure the power wire to the wire fish and than gently pull the power wire through the grommet. If you have to use excessive force to pass the wire, STOP and cut a bigger "X" in the grommet.
Step 12
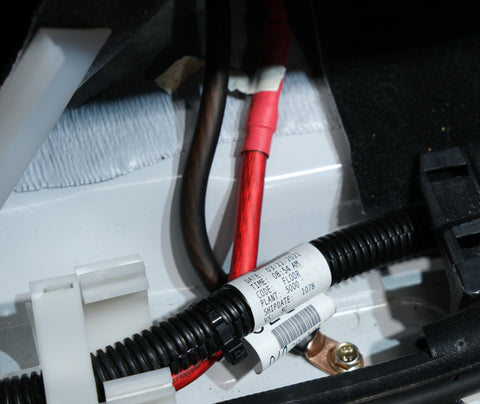
Route the power wire along the drivers fender, under the fuse panel bracket and towards the battery.
Step 13
Connect the red power wire to one end of the provided 200 Amp fuse block. Secure using a 5mm allen wrench until the set screw is firmly in place on the wire ferrel. Place plastic cover over connection.

Step 14
Connect the short section of red power wire to the other side of the fuse block. Secure using a 5mm allen wrench until the set screw is firmly in place on the wire ferrel. Place plastic cover over connection.

Step 15
Remove the bolt on the Positive battery terminal and secure the ring terminal of the red power wire to the Positive terminal.
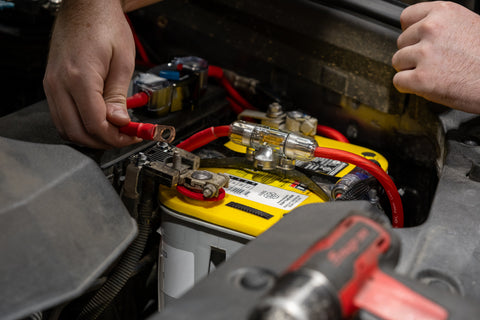
Step 16
Use the supplied zip ties or velcro to secure the fuse black and any other loose wires.
Step 17
Double check that all power and ground connections are secure. Reset blue disconnect switch on fuse block.
Step 18
Start vehicle. At this point the status lights should illuminate on the Voxx Power Systems unit and the battery will start charging.

Step 19
Once you have confirmed that you new Voxx Power Systems unit is installed completely and working properly, replace all kick panels, door sill and re-install driver seat bolts. Front Seat Torque Spec: 27 ft/lbs.
Step 20
Download the Voxx Power Systems app for the app store. This will allow you to control your new Voxx system via bluetooth.


