
Install Guide for your 2010-2013 4Runner that has an amplified system and had a backup camera in the head unit.
This installation guide is intended to be used to assist you during the installation of your
Sony 7000, 5600, 5500, 3200 or 150 4Runner Plug and Play Bundle from Trail Grid Pro.
Installation Videos
Sony Bundle Installation Video
Sony Microphone Install

OBD2 Plug Install
Routing OBD2 Plug
Sony Microphone Mount Video
Adding Front Facing USB
Installing your bundle
1. The Body - Consists of the head unit and our custom wiring harness.
You're Going To Install This First!
Sony Bundle Notes: Your Sony bundle will arrive with the dash kit cover detached from the body of the bundle - this will be different than shown in the video on this guide. The new Metra kit now utilizes the 4 factory 10mm bolts to secure the body of your head unit into the dash.
- Make all your vehicle connections as noted in the document below. We've drawn a red box around the vehicle connectors you'll be using for your installation, which are 1, 3 & the OBD2 port. Vehicle connectors 2, 4 and 5 will not be used.
- All the plugs are keyed plugs, which means they only fit their match on the Toyota side. All you're doing is matching plugs - it may look like a lot of wires but it's simple.

You will be using vehicle connectors 1, 3 & OBD2
- Next, secure the backup camera connection harness labeled CAM-TY12 (connect the female side of the CAM TY12 to the factory video harness), Sirius/XM satellite connection (if applicable), AM/FM antenna connection, Sony supplied microphone and the USB retention cable connection. Make sure you leave the hazard button connection accessible as you will plug it in when you're connecting the dash kit.
- DO NOT POWER ON YOUR HEAD-UNIT BEFORE ALL CONNECTIONS ARE MADE. This will cause an error when the PAC module is trying to calibrate to your vehicle.
More Install Tips Regarding The Components Of Your Sony Bundle
- Backup Camera Harness
- AM/FM Antenna Adapter
- USB Retention Cable
- Sony Microphone
- Sirius/XM Retention
To secure your backup camera connection, ensure the female side of the backup camera harness labeled CAM TY12 is plugged into the factory video connection. The connectors are keyed, so they’ll only fit their mate.
OBD-2 Plug:
- You can find the OBD-2 connection under your steering column just above the brake pedal.
- The small end of the OBD-2 plug will connect to a small white plug just down the wiring harness from vehicle connectors 1 through 5.
- Remove the current connector first, then plug in the small end of the OBD-2. The OBD-2 plug maintains your reverse signal. This is only applicable to 2010 – 2013 4Runners with their reverse camera in their head unit.
Your bundle will come equipped with a antenna adapter that will be plugged into the lower left hand corner of the rear of the chassis. Please make sure you plug in the factory antenna plug into our antenna adapter.
If you have a 2010 – 2012 4Runner, in some cases you won’t have the item I’ve described above as your factory antenna cable is already circular (doesn’t require an antenna adapter) and simply plugs directly into the back of the Sony radio.
2010 – 2013 4Runner:
If your USB connection is in your glove box, included is a kit to create a front facing USB. Follow this segment of video to create a front facing USB.
2012 – 2019 4Runner:
If your factory USB location is underneath your head unit included in your kit is a USB retention adapter.
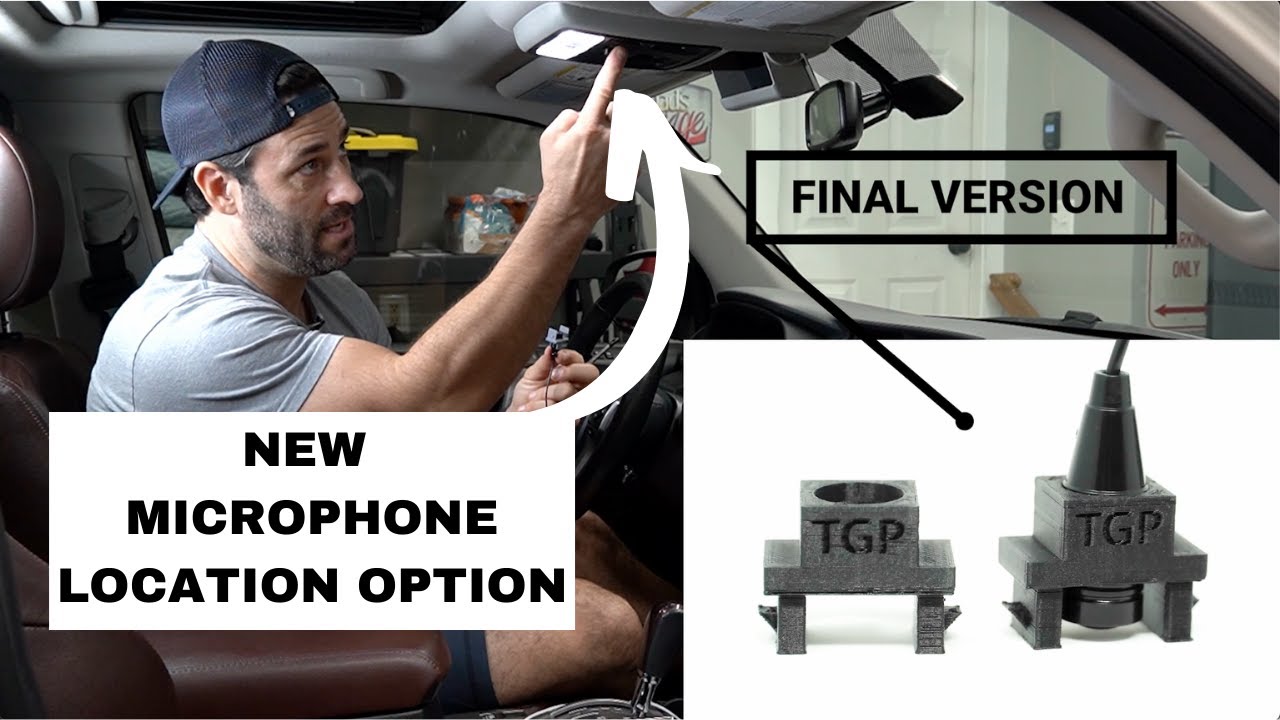
You will need to use the provided Sony microphone with our bundle. We’ve included our brand new microphone mount with your kit. See this video regarding how to install it.
Or, you can mount the microphone in our previous suggested location. Watch this regarding how to install: 4Runner mic install
2010 – 2013: If you selected “Maintain Sirius/XM” at checkout you’ll receive the SXV300.
The SXV300 tuner will be mounted on the back of your bundle, and plugged into the back of the Sony radio.
The antenna will be in the parts bag in your box.
You will need to use the provided satellite antenna in the kit. We are not able to retain your factory antenna. The antenna will need to be mounted on the outside of the vehicle for optimal signal.
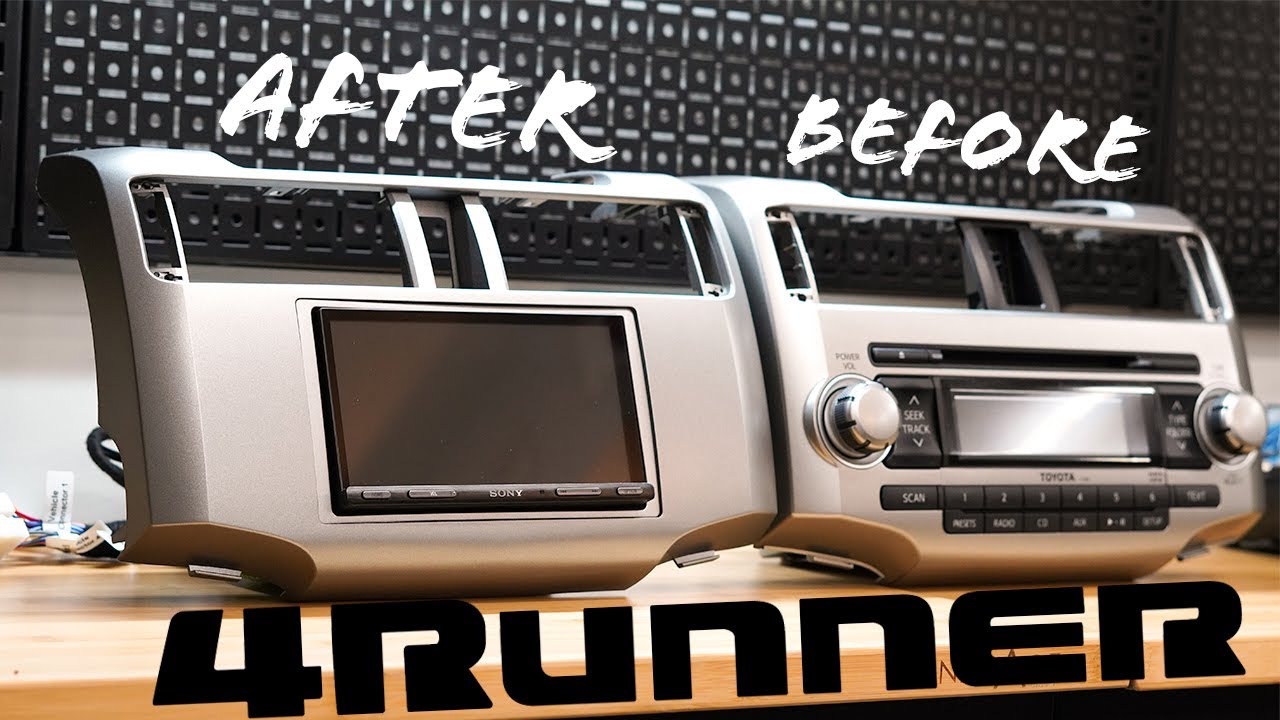
2. The Dash Kit: Your new Silver or Charcoal Metra 4Runner dash cover.
You're going to install this second.
- Transfer your vents, trim pieces, and install the hazard button trim to the dash kit just like in the video.
- Small white clips: Please use the small white tab clips; supplied in the bundle, to attach to the four tabs on the back of our dash kit. They are more robust than the factory clips and hold our bundle in place better.
- Make sure to connect the hazard button wire before installing the dash kit.
Troubleshooting
- Use a Factory USB Cable
- Android Auto
- Steering Wheel Control Reset
Using a factory phone cable when making your connection for Apple CarPlay or Android Auto is a MUST. When I say factory, I mean just like the cable that originally came with your phone. It cannot be a cable that you bought from Amazon or from the grocery store – those are only charging cables in most cases, not charging and data cables. Also, remember – phone cables don’t last forever. If you ever have connectivity issues in the future – I’d try to swap your cable for a new one.
Download the Android Auto app from the GooglePlay. If you’re experiencing issues with Android Auto, here is a decent video that walks you through some troubleshooting of Android Auto. The head unit shown in this video is not a Sony, so just focus on the general troubleshooting aspects.
(1) Ensure the 3.5mm black plug on the back of the radio is plugged in to the blue port on the back of the radio labeled “remote” (2) Ensure the Sony system is set correctly to accept preset steering wheel controls from the PAC module by checking the following within the Sony head unit settings. Go to settings -> general -> steering wheel controls and ensure its set to “preset” If those two items above are good to go, complete the following steps in the exact order below. Try these steps while in “preset” steering wheel control (1) Unplug the power plug from the PAC RP4.2 TY11 for at least 5 seconds. The power plug is the plug with the red, black and yellow wires (and only those color wires). (2) Turn on your vehicle and let the system power up. (3) Complete the master reset process (Restore Factory Settings) noted on page 6 of the attached document (4) When the master reset process is complete, perform a simple reset which is accomplished by just pressing and immediately releasing the “reset” button. After you’ve completed the last step, give it about 10 seconds and then test your steering wheel controls. If after these steps, steering wheel controls are still not working you can always set the steering wheel controls yourself via the Sony head unit settings. To accomplish this you’ll go to settings -> general -> steering wheel controls and set them to “custom” – at this point you’ll most likely be presented with a gear icon and once pressed you’ll be able to manually map each button on your steering wheel controls by following the prompts on your head unit.
Restoring Factory Settings
You can restore the interface to factory default settings by pressing and holding the programming button on the side of the module until the status LED starts blinking red. Once the LED starts blinking red, release the button. You must release the button while the LED is blinking red in order to perform the reset. Please note, the LED will go through two stages before it starts blinking red. First it will blink green, then amber, then red.
This reset will restore the following settings to their factory defaults:
- SWC Mapping
- Parking Brake Output Settings
- Factory Amplifier Settings
- Real Fade will be reset to on
Dip Switch Settings
If after completing these steps you’re not able to function all your steering wheel controls (answer on specifically), on the PAC module change the dip switches on the side of the module to 1, 2 & 3 as “on” and 4 as “off”. Currently, they are set to the exact opposite of that with 4 as “on” and 1, 2 & 3 as “off” – so you’ll just be reversing them.
KEEP CLIMBING


Install Guide for your 2010-2013 4Runner that has an amplified system and had a backup camera in the head unit.
This installation guide is intended to be used to assist you during the installation of your
Sony 7000, 5600, 5500, 3200 or 150 4Runner Plug and Play Bundle from Trail Grid Pro.
Installation Videos
Sony Bundle Installation Video
Sony Microphone Install
OBD2 Plug Install
Routing OBD2 Plug
Sony Microphone Mount Video
Adding Front Facing USB
Installing your bundle
1. The Body - Consists of the head unit and our custom wiring harness.
You're Going To Install This First!
Sony Bundle Notes: Your Sony bundle will arrive with the dash kit cover detached from the body of the bundle - this will be different than shown in the video on this guide. The new Metra kit now utilizes the 4 factory 10mm bolts to secure the body of your head unit into the dash.
- Make all your vehicle connections as noted in the document below. We've drawn a red box around the vehicle connectors you'll be using for your installation, which are 1, 3 & the OBD2 port. Vehicle connectors 2, 4 and 5 will not be used.
- All the plugs are keyed plugs, which means they only fit their match on the Toyota side. All you're doing is matching plugs - it may look like a lot of wires but it's simple.
You will be using vehicle connectors 1, 3 & OBD2
- Next, secure the backup camera connection harness labeled CAM-TY12 (connect the female side of the CAM TY12 to the factory video harness), Sirius/XM satellite connection (if applicable), AM/FM antenna connection, Sony supplied microphone and the USB retention cable connection. Make sure you leave the hazard button connection accessible as you will plug it in when you're connecting the dash kit.
- DO NOT POWER ON YOUR HEAD-UNIT BEFORE ALL CONNECTIONS ARE MADE. This will cause an error when the PAC module is trying to calibrate to your vehicle.
More Install Tips Regarding The Components Of Your Sony Bundle
- Backup Camera Harness
- AM/FM Antenna Adapter
- USB Retention Cable
- Sony Microphone
- Sirius/XM Retention
To secure your backup camera connection, ensure the female side of the backup camera harness labeled CAM TY12 is plugged into the factory video connection. The connectors are keyed, so they’ll only fit their mate.
OBD-2 Plug:
- You can find the OBD-2 connection under your steering column just above the brake pedal.
- The small end of the OBD-2 plug will connect to a small white plug just down the wiring harness from vehicle connectors 1 through 5.
- Remove the current connector first, then plug in the small end of the OBD-2. The OBD-2 plug maintains your reverse signal. This is only applicable to 2010 – 2013 4Runners with their reverse camera in their head unit.
Your bundle will come equipped with a antenna adapter that will be plugged into the lower left hand corner of the rear of the chassis. Please make sure you plug in the factory antenna plug into our antenna adapter.
If you have a 2010 – 2012 4Runner, in some cases you won’t have the item I’ve described above as your factory antenna cable is already circular (doesn’t require an antenna adapter) and simply plugs directly into the back of the Sony radio.
2010 – 2013 4Runner:
If your USB connection is in your glove box, included is a kit to create a front facing USB. Follow this segment of video to create a front facing USB.
2012 – 2019 4Runner:
If your factory USB location is underneath your head unit included in your kit is a USB retention adapter.
You will need to use the provided Sony microphone with our bundle. We’ve included our brand new microphone mount with your kit. See this video regarding how to install it.
Or, you can mount the microphone in our previous suggested location. Watch this regarding how to install: 4Runner mic install
2010 – 2013: If you selected “Maintain Sirius/XM” at checkout you’ll receive the SXV300.
The SXV300 tuner will be mounted on the back of your bundle, and plugged into the back of the Sony radio.
The antenna will be in the parts bag in your box.
You will need to use the provided satellite antenna in the kit. We are not able to retain your factory antenna. The antenna will need to be mounted on the outside of the vehicle for optimal signal.
2. The Dash Kit: Your new Silver or Charcoal Metra 4Runner dash cover.
You're going to install this second.
- Transfer your vents, trim pieces, and install the hazard button trim to the dash kit just like in the video.
- Small white clips: Please use the small white tab clips; supplied in the bundle, to attach to the four tabs on the back of our dash kit. They are more robust than the factory clips and hold our bundle in place better.
- Make sure to connect the hazard button wire before installing the dash kit.
Troubleshooting
- Use a Factory USB Cable
- Android Auto
- Steering Wheel Control Reset
Using a factory phone cable when making your connection for Apple CarPlay or Android Auto is a MUST. When I say factory, I mean just like the cable that originally came with your phone. It cannot be a cable that you bought from Amazon or from the grocery store – those are only charging cables in most cases, not charging and data cables. Also, remember – phone cables don’t last forever. If you ever have connectivity issues in the future – I’d try to swap your cable for a new one.
Download the Android Auto app from the GooglePlay. If you’re experiencing issues with Android Auto, here is a decent video that walks you through some troubleshooting of Android Auto. The head unit shown in this video is not a Sony, so just focus on the general troubleshooting aspects.
(1) Ensure the 3.5mm black plug on the back of the radio is plugged in to the blue port on the back of the radio labeled “remote” (2) Ensure the Sony system is set correctly to accept preset steering wheel controls from the PAC module by checking the following within the Sony head unit settings. Go to settings -> general -> steering wheel controls and ensure its set to “preset” If those two items above are good to go, complete the following steps in the exact order below. Try these steps while in “preset” steering wheel control (1) Unplug the power plug from the PAC RP4.2 TY11 for at least 5 seconds. The power plug is the plug with the red, black and yellow wires (and only those color wires). (2) Turn on your vehicle and let the system power up. (3) Complete the master reset process (Restore Factory Settings) noted on page 6 of the attached document (4) When the master reset process is complete, perform a simple reset which is accomplished by just pressing and immediately releasing the “reset” button. After you’ve completed the last step, give it about 10 seconds and then test your steering wheel controls. If after these steps, steering wheel controls are still not working you can always set the steering wheel controls yourself via the Sony head unit settings. To accomplish this you’ll go to settings -> general -> steering wheel controls and set them to “custom” – at this point you’ll most likely be presented with a gear icon and once pressed you’ll be able to manually map each button on your steering wheel controls by following the prompts on your head unit.
Restoring Factory Settings
You can restore the interface to factory default settings by pressing and holding the programming button on the side of the module until the status LED starts blinking red. Once the LED starts blinking red, release the button. You must release the button while the LED is blinking red in order to perform the reset. Please note, the LED will go through two stages before it starts blinking red. First it will blink green, then amber, then red.
This reset will restore the following settings to their factory defaults:
- SWC Mapping
- Parking Brake Output Settings
- Factory Amplifier Settings
- Real Fade will be reset to on
Dip Switch Settings
If after completing these steps you’re not able to function all your steering wheel controls (answer on specifically), on the PAC module change the dip switches on the side of the module to 1, 2 & 3 as “on” and 4 as “off”. Currently, they are set to the exact opposite of that with 4 as “on” and 1, 2 & 3 as “off” – so you’ll just be reversing them.


